
We’ve seen the Reels, the TikTok videos, and the countless Instagram posts about how amazing Peel & Stick Wallpaper is. Well, as an Interior Designer and avid DIYer—peel and stick removable wallpaper can be a pretty sticky situation. You’ve bought the wallpaper, the wallpaper spatula scraper, and your Xacto knife is ready to go! Now what? You could just jump in and go for it, but let me save you a little trouble and give you a few tips.
They make it look so easy! How’d they do that?! First—all the quick and easy tutorials that you’ve seen isn’t their first wallpaper rodeo. If I showed you a step by step video—we’d be here all day. Not going to lie, it takes patience! Always allow yourself more time to accomplish this project, especially if it is your first time.
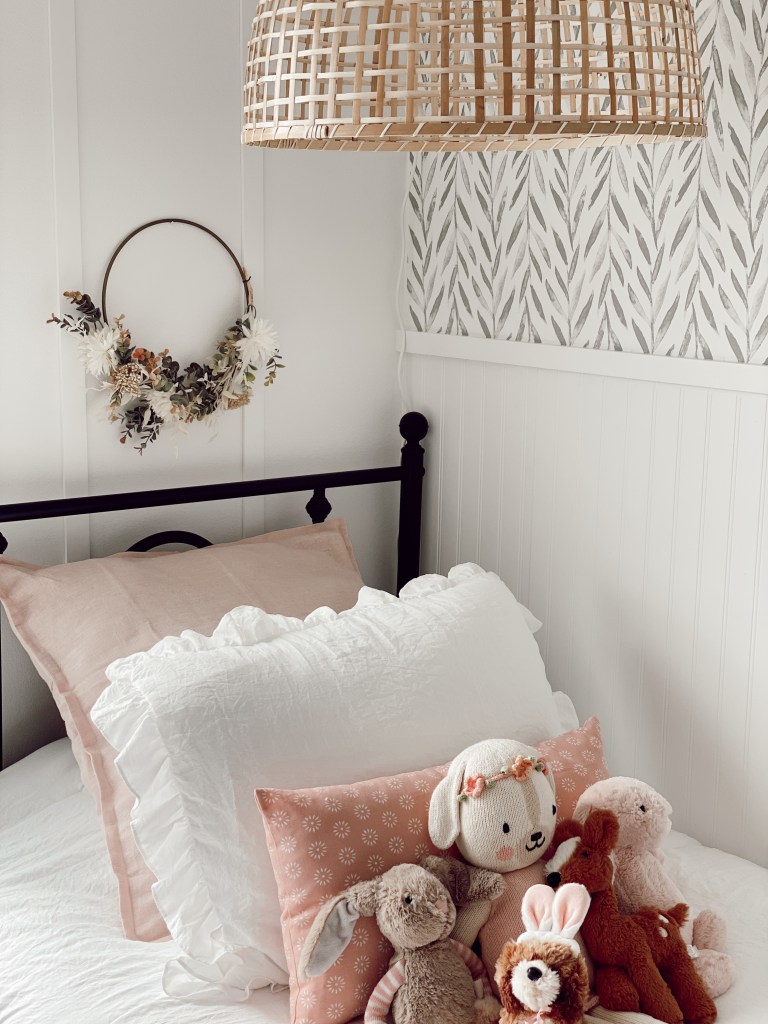
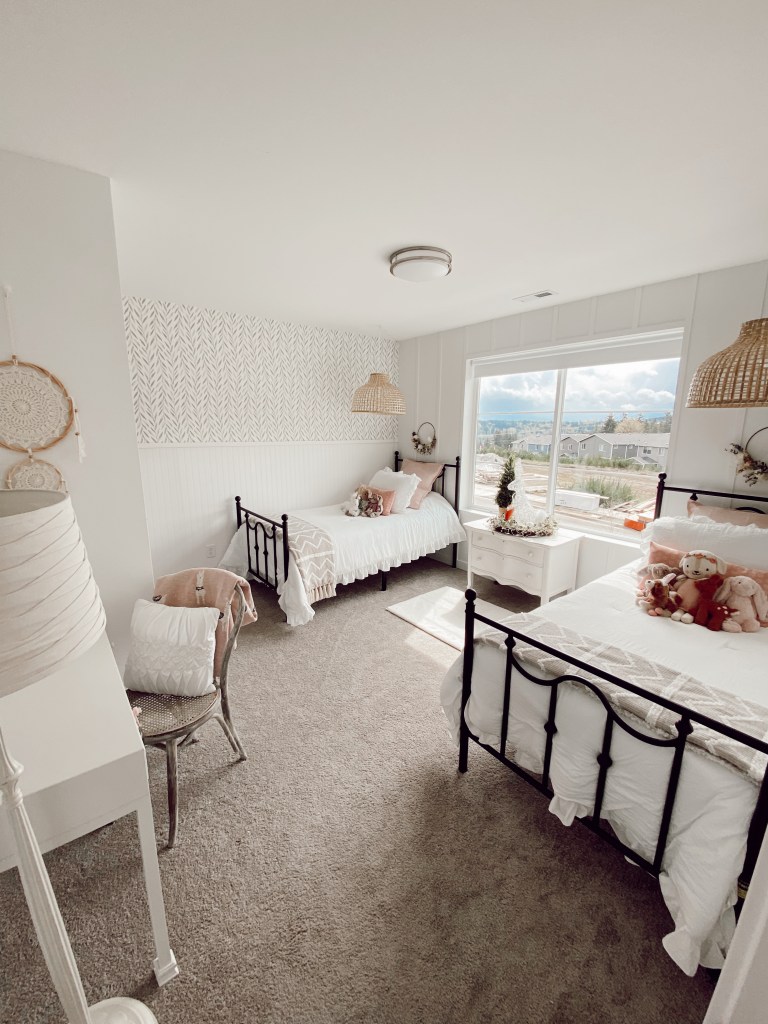
One big piece of advice for first time peel and stickers—opt for a design that does not require an entire wall to be covered. I went for a design with a little less than half the wall. My husband helped me cut down the beadboard and added a trim piece on top to give it a finished look. Then, I caulked all the nail holes and seams. Finished it off with Sherwin Williams Pure White in an eggshell finish.
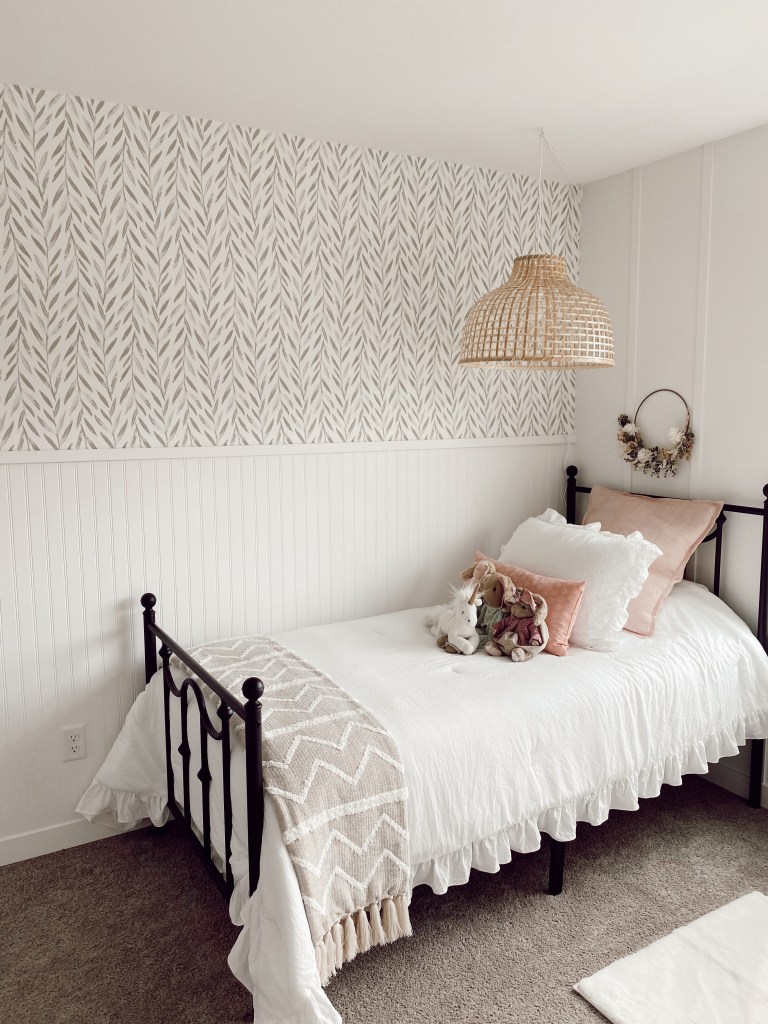
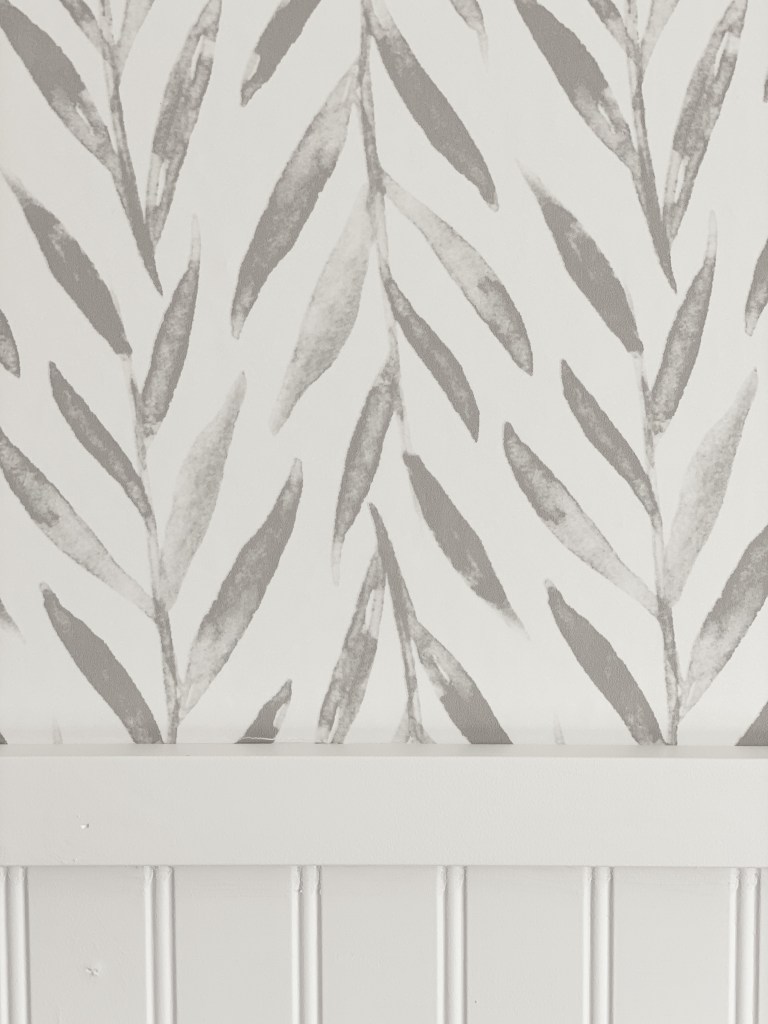
Now I was ready for the peel and stick removable wallpaper! I ordered Magnolia Home’s Willow design in a light taupe grey color-way. I wanted to keep the girls’ room airy and neutral to allow for seasonal changes. This watercolor willow design was perfect to add visual texture with a touch of whimsy.
The walls were already SW Pure White in a flat matte finish, and if there is any sheen to your current walls, you may want to rough them up a bit with sandpaper (just make sure you wipe your walls down afterwards). This will secure the adhesion of your wallpaper. You will also want to consider your current paint color. Darker paint colors may show through a wallpaper with a white background.

Never in my life have I seen a perfectly square and straight wall. They don’t exist! So, you’re going to need a level to draw a faint line on your wall to use as a guide. Measure over the width of your wallpaper starting from the left top corner and make a mark. Next, you’ll put the level on your wall, and gradually bring it down the wall to draw a straight line from the top. After your faint line is drawn, take the level back up your line to ensure it is straight.
Take your wallpaper roll and unroll it a few feet. Carefully peel back the top 5-6”, and when you’re on your ladder, leave about 2” of excess wallpaper on top above your starting point—this will be cut after you have all your wallpaper hung for a clean look. The instructions on the wallpaper said to slowly start in the middle with the spatula and gently scrape the wallpaper to the wall while gently pulling the backing downwards. (You don’t want to pull the wallpaper too tight as it could stretch.) I found this worked some of the time, but I often found that slowly starting at the top and then working my way from left to right and slowly down was best. Less of a risk of unsightly wrinkling and creases. Once you have the first quarter top adhered to your wall, you can now see where you’ll need to cut the end of your first panel. Be sure to leave 2-3” of extra paper to hang off the end to be cut with an Xacto knife when it it all completed.
Air bubbles can be pressed out by gently lifting the paper again, and then using the scraper to gently press the wallpaper onto the wall. I also found that as you near the bottom, around the halfway point, you’ll want to carefully pull off all the backing. If your wallpaper is laying pretty flat on the wall, it’s safe to gently scrape your wallpaper down with the spatula.
Now lining up your second piece can be a real challenge! You have to find the closest pattern repeat near the top of your roll. This is where you really need to add 10-20% of overage to your order. Depending on your pattern repeat, you may end up with quite a bit of waste! I had some waste, but luckily I ordered a whole extra roll just in case.
When you find that pattern repeat—in my case it was lining up the tip of a leaf, I lined it up as close as I could to the wallpaper on the wall. Some suggest overlapping the new panel, but I found you lost some of the design, and the white was a bit see through. Getting the new panel lined up as close as possible is key! It is like applying a giant sticker to your wall, but I lifted and moved the panels a lot and still got great adhesion to the walls. I would recommend trying not to touch the back of the wallpaper as much as possible, and please wash your hands! Starting with clean hands will ensure that the oils on your hands and any other dust or debris won’t stick to the back of your wallpaper.
Let me know if you have any questions with your Peel & Stick Removable Wallpaper, and remember even the best of us have difficulty with some things that may be easier for others! Take on each project with positivity, and you may surprise yourself!
Supplies needed for this DIY Project:
- Magnolia Home Removable Peel & Stick Wallpaper in Willow Grey
- Wallpaper Application Kit
- Level
- Pencil
- Ladder
- Measuring Tape
- Beadboard
- Wall Trim
- Nail Gun
- Sherwin Williams Pure White—eggshell finish
- Painting supplies
